
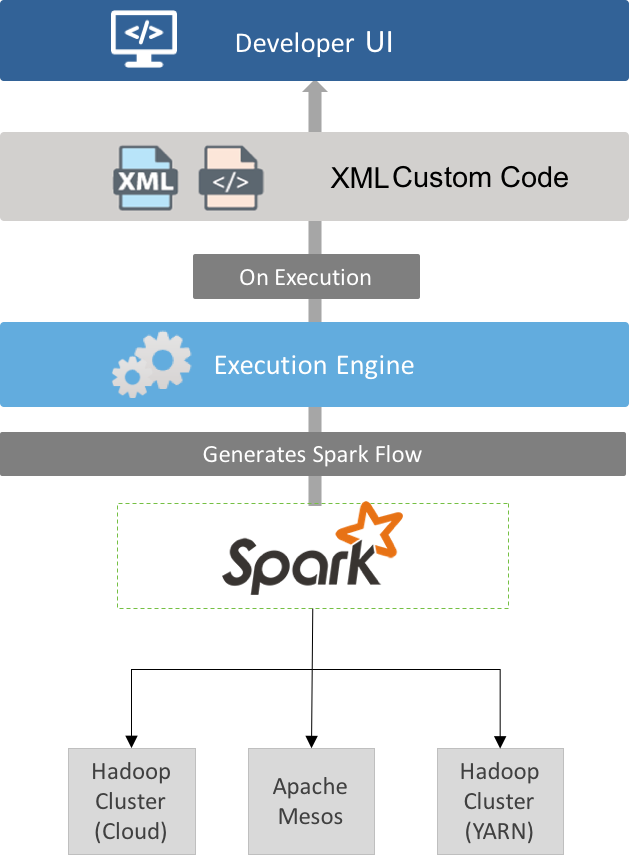
At it’s core, the Hydrograph project consists of three components - the developer UI, the XML custom code, and the backend execution engine. It’s important to have a general understanding of these components before you install Hydrograph, as we’ll refer back to these components during our installation instructions.
The Hydrograph UI allows an ETL developer to easily drag-and-drop components and join them together to create data flows. One or more such data flows can be grouped together in a Hydrograph job. For complex data pipelines, the UI supports the creation of ETL projects that can group together a set of related jobs. Users can also leverage the UI to create external schemas, job property files, and even to write custom transformation classes. The Hydrograph UI is intended to serve as the starting point for testing of an ETL job, and it supports features such as execution tracking and a data viewing interface.
The XML custom code serves as an abstraction layer between the UI and the engine. This abstraction layer allows Hydrograph to evolve as the big data landscape chages - for example, we could swap out the back end execution engine withoug changing the UI. When you save a Hydrograph job file in the UI, it automatically generates a XML file containing the components, their attributes, schemas, and links to next component. The execution engine is able to parse this XML file and create/submit the corresponding Spark flows.
The execution engine is the core component that performs that transformations specified in the UI. The engine parses the XML that is generated by the UI, converts it to Spark flows and submits these flows to the scheduler. Using Spark as the execution engine provides for a flexible deployment model - users can run on a standalone Spark installation or run their job on a Hadoop cluster where Spark is installed.